-01.png)


1. Set Up Automatic Rules to Optimize Your Ads Without the Hassle
Automatic rules help busy business owners like you to optimize campaigns without constantly managing them. With automated rules, you can automatically pause ads or audiences that aren’t working, increase budgets for top-performing audiences, and more. This saves you time and ensures you’re always optimizing your campaigns.
How to create automatic rules:
- Step 1: Go to Automated Rules under Meta Ads Manager or via this link.
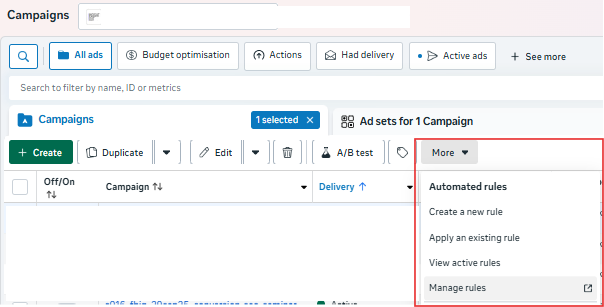
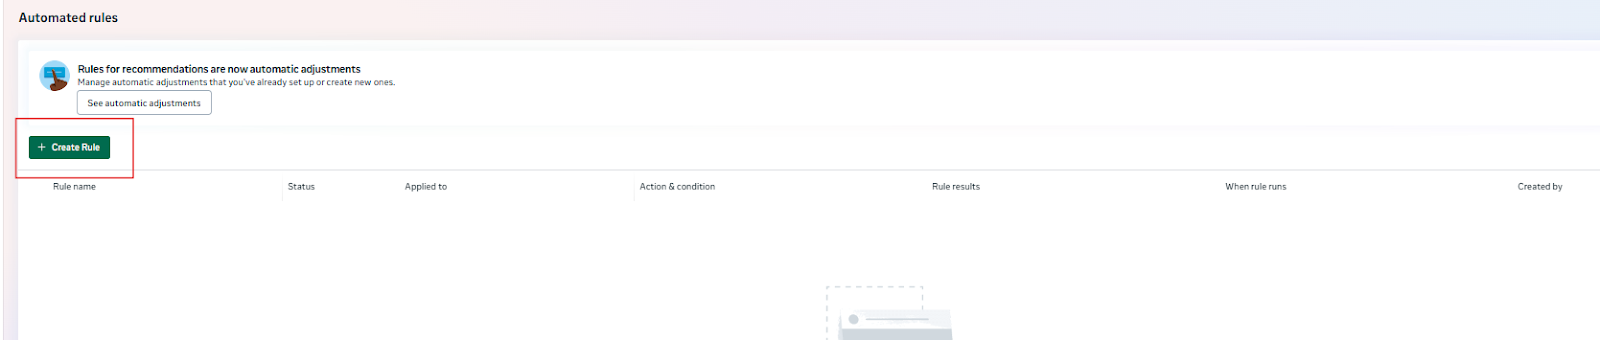
- Step 2: Click on “Create Rule”
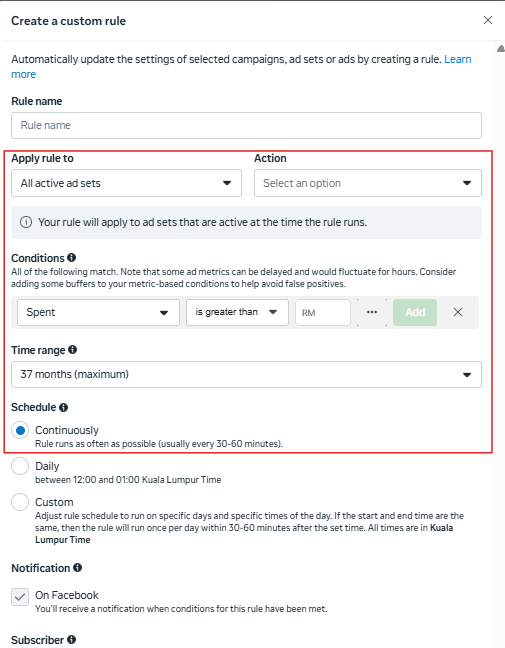
- Step 3: Create the conditions based on your criteria.
Examples of Automatic Rules
As a starting point, I would recommend these two basic automated rules:
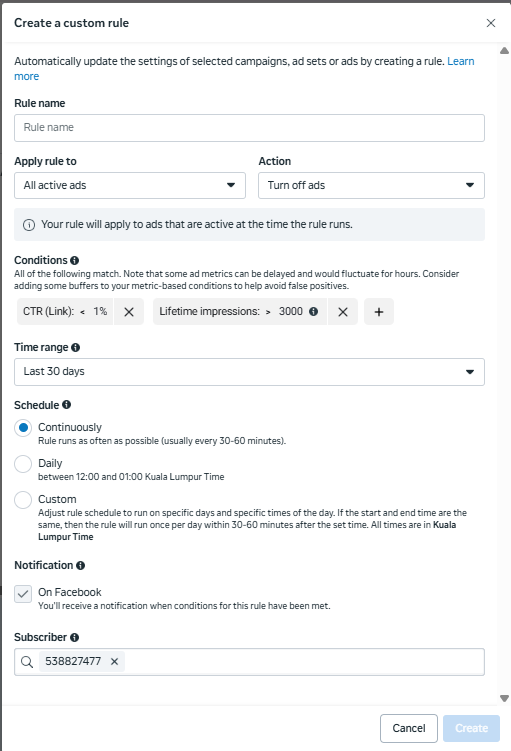
Rule 1: Turn off poor performing ads based on Click through Rates.
This will help improve overall ad performance by turning off non-performing ads once they are conclusive and have been tested sufficiently.
- Apply rule to: All Active Ads
- Action: Turn off ads
- Conditions:
- CTR (Link): < 1% (Or your historical average CTR)
- Lifetime impressions > 3000 (so that your ad had sufficient time to learn and run)
- Schedule: Continuously
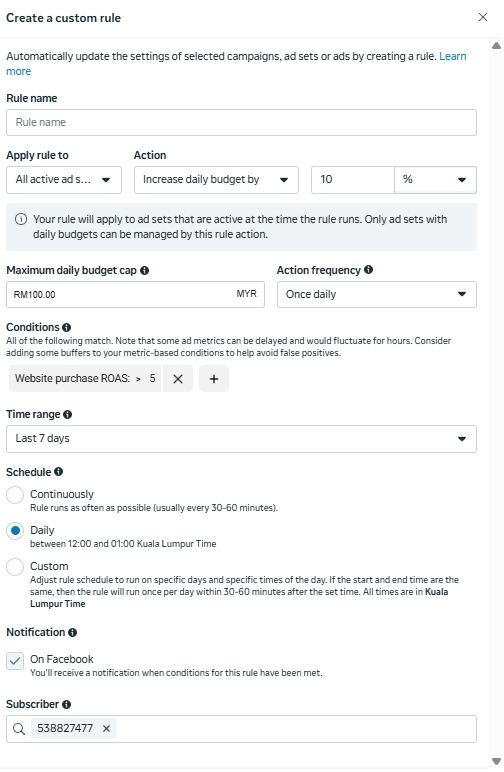
Rule 2: Scale performing ads and audiences
This will help to scale performing ad sets and ads automatically based on your sales value.
- Apply rule to: All active ad sets
- Increase daily budget by 10%
- Maximum daily budget cap: (As per your budget/ audience size)
- Action frequency: Once daily (Note: budget increases beyond 10% per hour on Meta will trigger re-learning, hence 10% per hour maximum should be the limit.)
- Conditions:
- Website purchase ROAS: >5
- Schedule: Daily
There are many more rules to explore including pausing high CPC ads, increasing budget for ads with low CPM and high engagement, and even pausing ads after a specific timeframe. Explore different conditions to help you save both ad dollars and time.
2. Sync Your Shopify Store with Meta to Use Dynamic Product Ads
Is your product list extremely long and you’re wondering how to save time setting up and ad for every single product in your store? Introducing: Dynamic Product Ads (DPA). These ads automatically pull product details (images, pricing, and descriptions) from your Shopify catalog, saving you time while personalizing the experience for customers.
(If you don’t have Shopify, skip ahead to tip 4 as we will share an alternative if your eCommerce store does not have a Facebook plug-ins)
How to Implement:
1. Connect Your Shopify Store to Meta:
Step 1: In Shopify Admin, go to Sales Channels > Apps and find Meta (Facebook & Instagram)
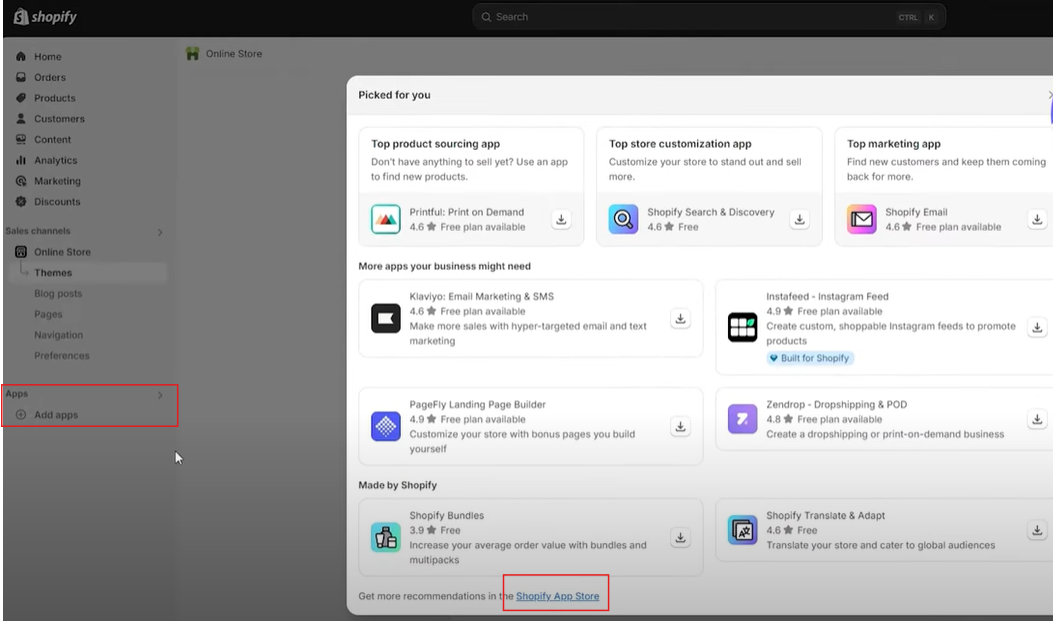
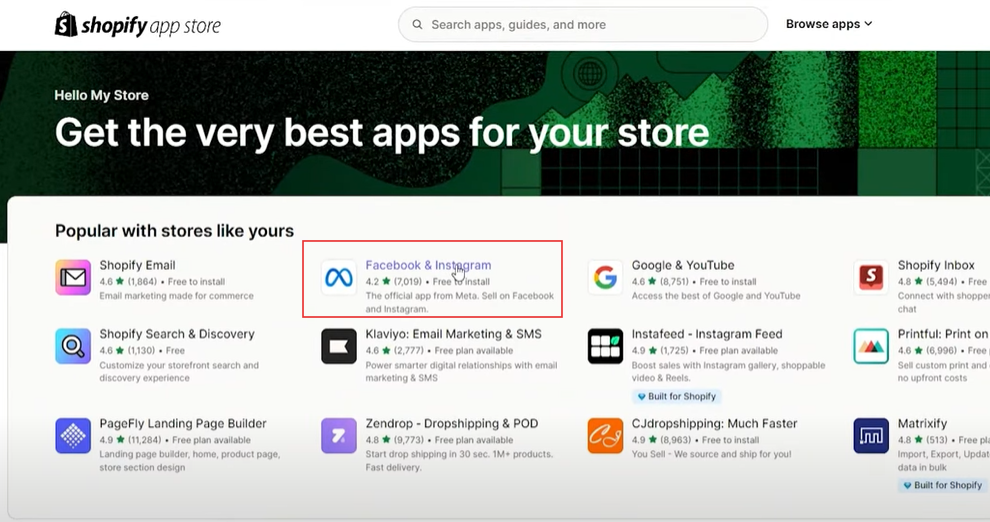
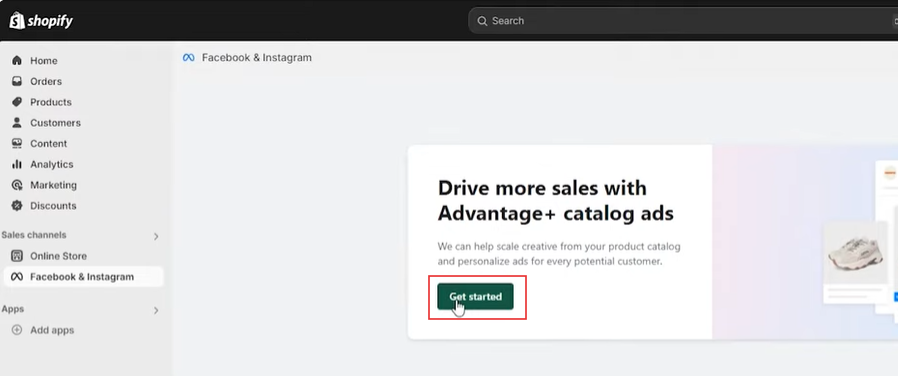
Step 2: Follow the prompts to install the app into your Shopify account
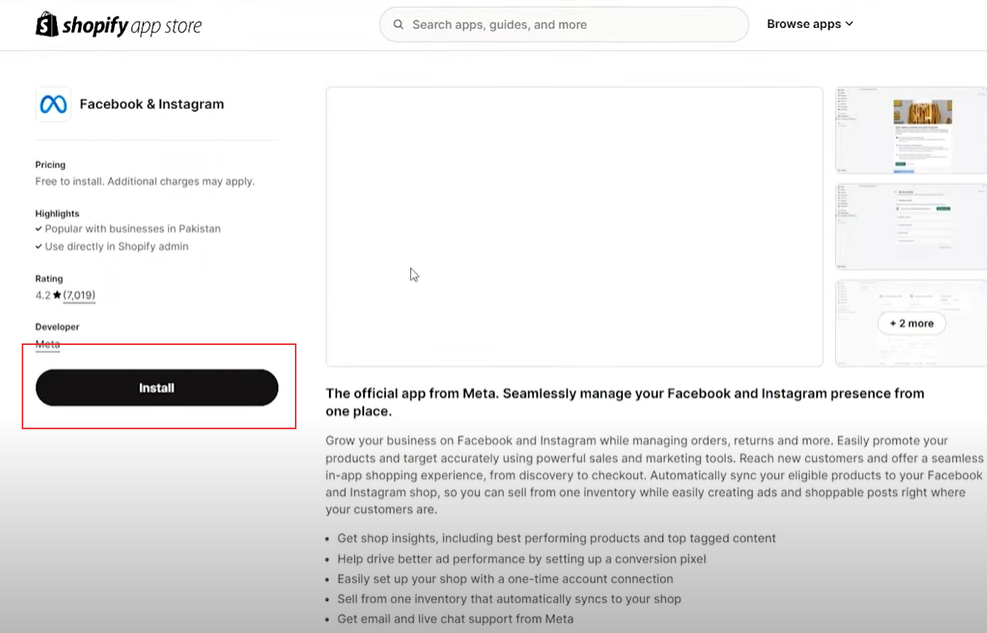
Step 3: Once installed, connect it to your Facebook Account.
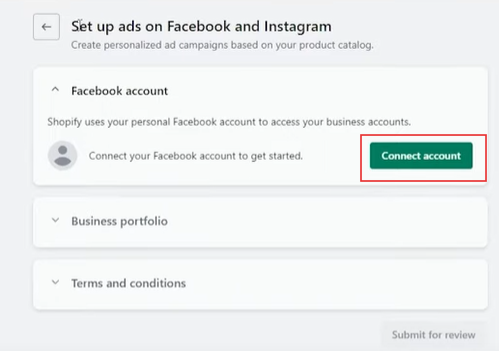
Pop ups will appear for you to connect to your business account via Facebook. After which you will choose Data Sharing preferences and also choose which Pixel to connect to. Finalise the terms and conditions.
Step 4: Connect your products to Facebook
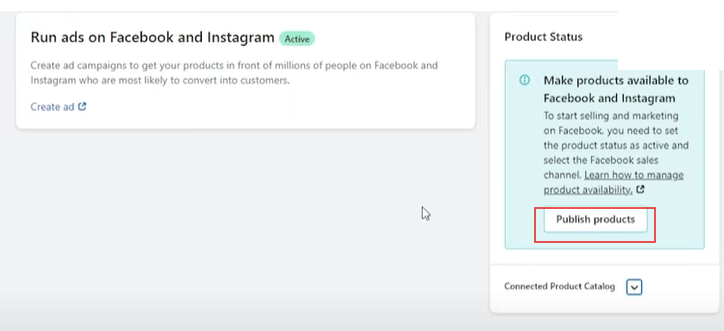
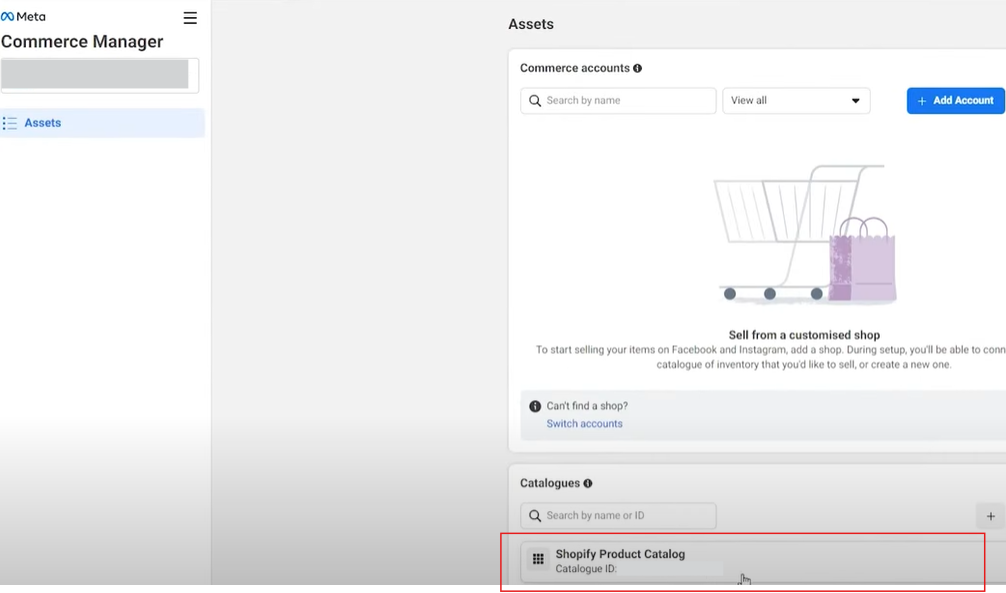
Step 5: Check that your Meta Commerce Manager is connected to your product catalog
2. Create Dynamic Product Ads:
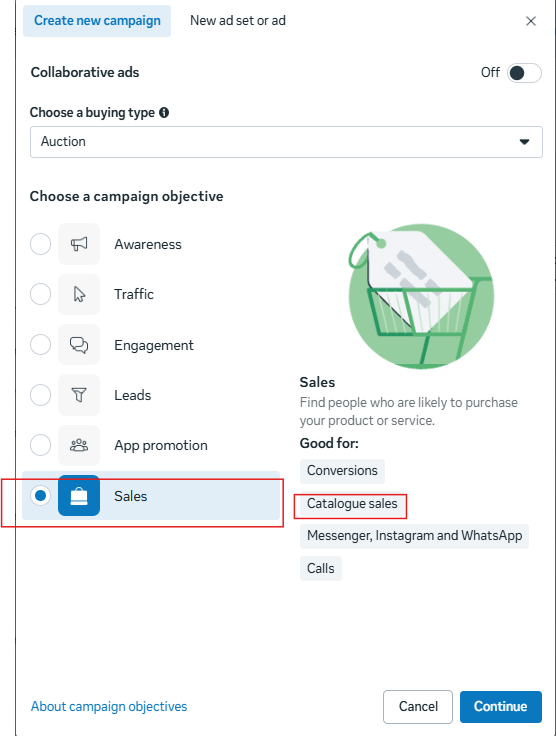
Step 1: In Meta Ads Manager, select Catalog Sales as your campaign objective.
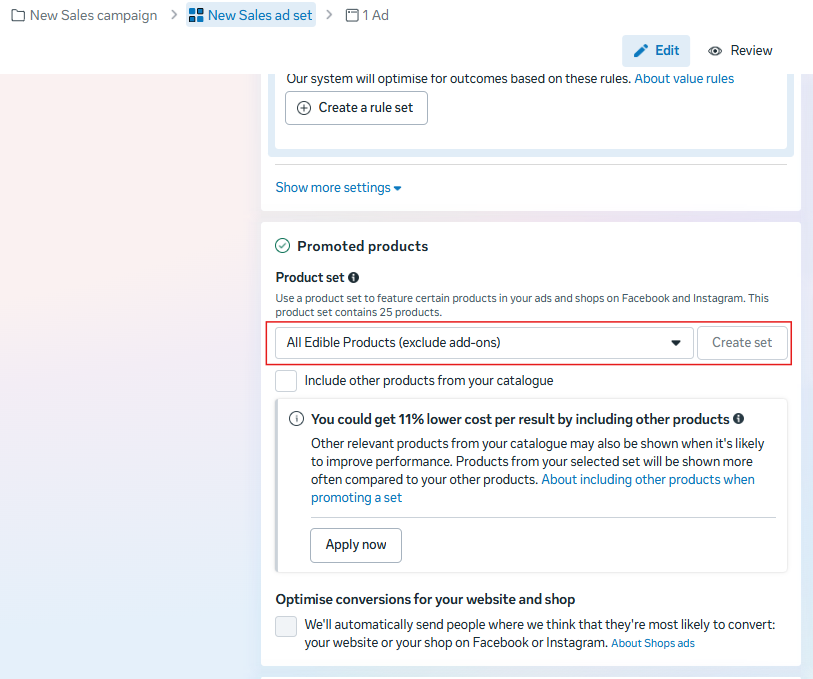
Step 2: Under Ad set level, choose the product catalog synced with Shopify
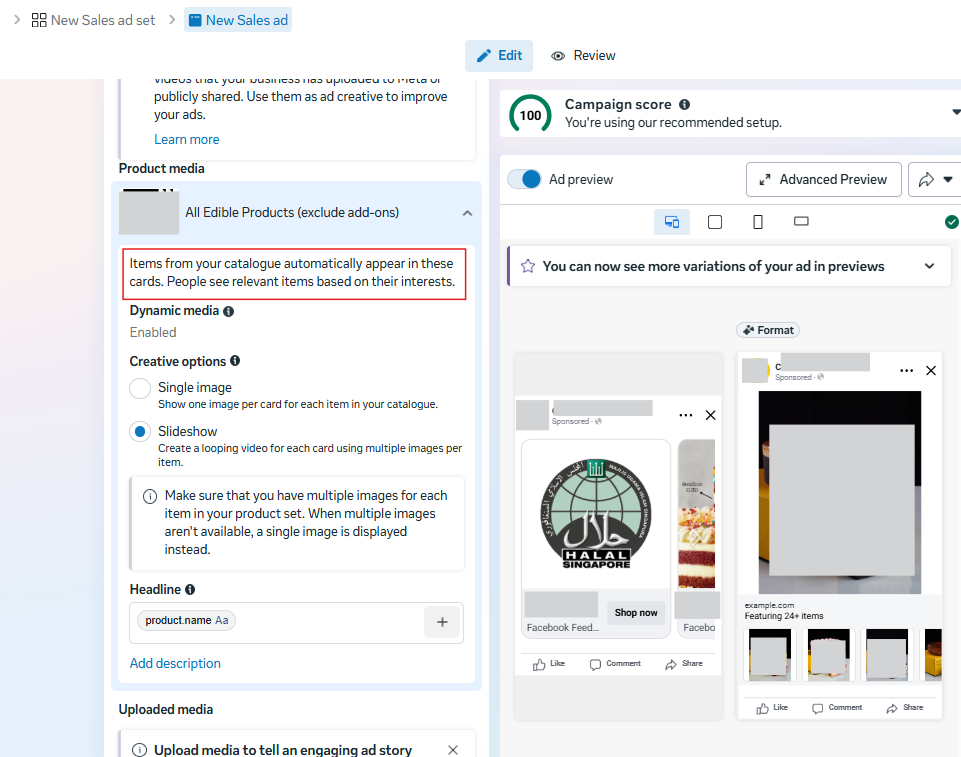
Step 3: Preview and publish your ad at the Ad level.
The products should be automatically populated into the ad based on your catalogue
Now you are ready to use the next tip below to target the right audience with a dynamic ad via retargeting.
3. Use Retargeting to Win Back Abandoned Carts
Ever wondered how you see Facebook Ads of the exact product you saw on an online store? The brand is probably using retargeting paired with Dynamic Product Ads (DPA). Retargeting people who have interacted with your website or added items to their cart but didn’t purchase is one of the most cost-effective ways to boost conversions. Meta’s retargeting features allow you to specifically target these potential customers with tailored offers.
How to Implement:
1. Create Retargeting Audiences:
Step 1: In Meta Ads Manager, go to Audiences > Create Audience > Custom Audience
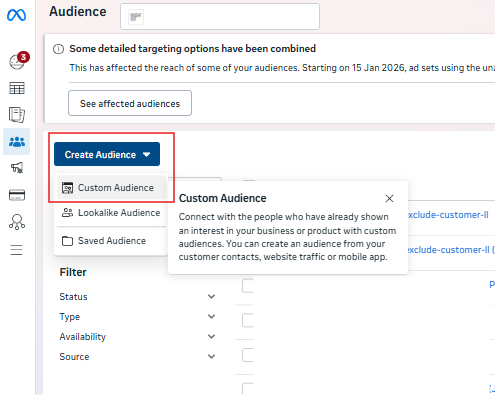
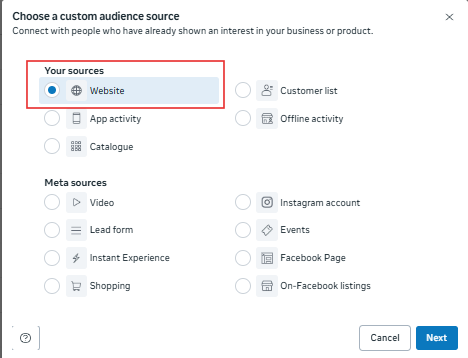
Step 2: Select Website visitors as the source
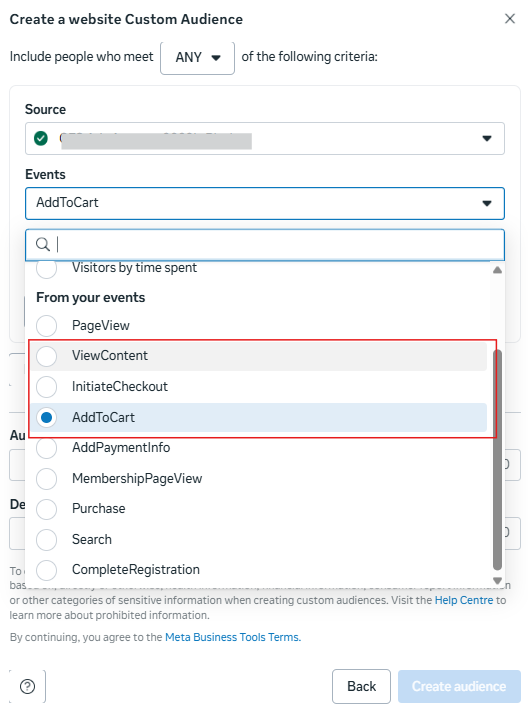
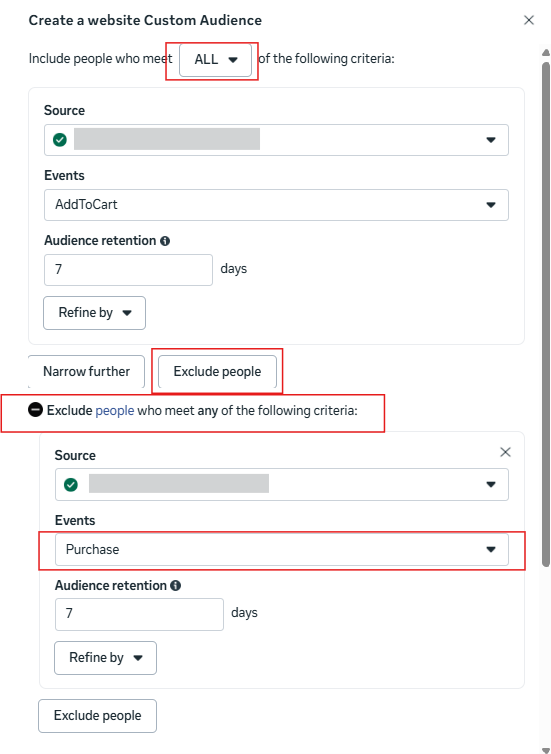
Step 3: Select visitors who added products to their cart/ initiated checkout or viewed specific pages.
Step 4: Exclude users who have purchased (So that you’re only targeted cart abandoners). Make sure to use the “ALL” criteria
2. Set Up Retargeting Campaigns:
- Choose Conversions as your campaign objective.
- Use dynamic ads (from tip 2) to show users the exact products they left behind.
- Include a compelling offer like free shipping or discounts to encourage them to complete their purchase.
Quick Tip: “Delay the retargeting ads by 24 hours after cart abandonment to ensure you’re reaching people while the product is still fresh in their mind.”
4. No Shopify? Use Carousel Ads to Showcase Multiple Products with specific retargeting
If your eCommerce store does not have plugins with Meta, you can still create a similar effect through carousel ads and specific retargeting. (Although this workaround works best with smaller product catalogs.)
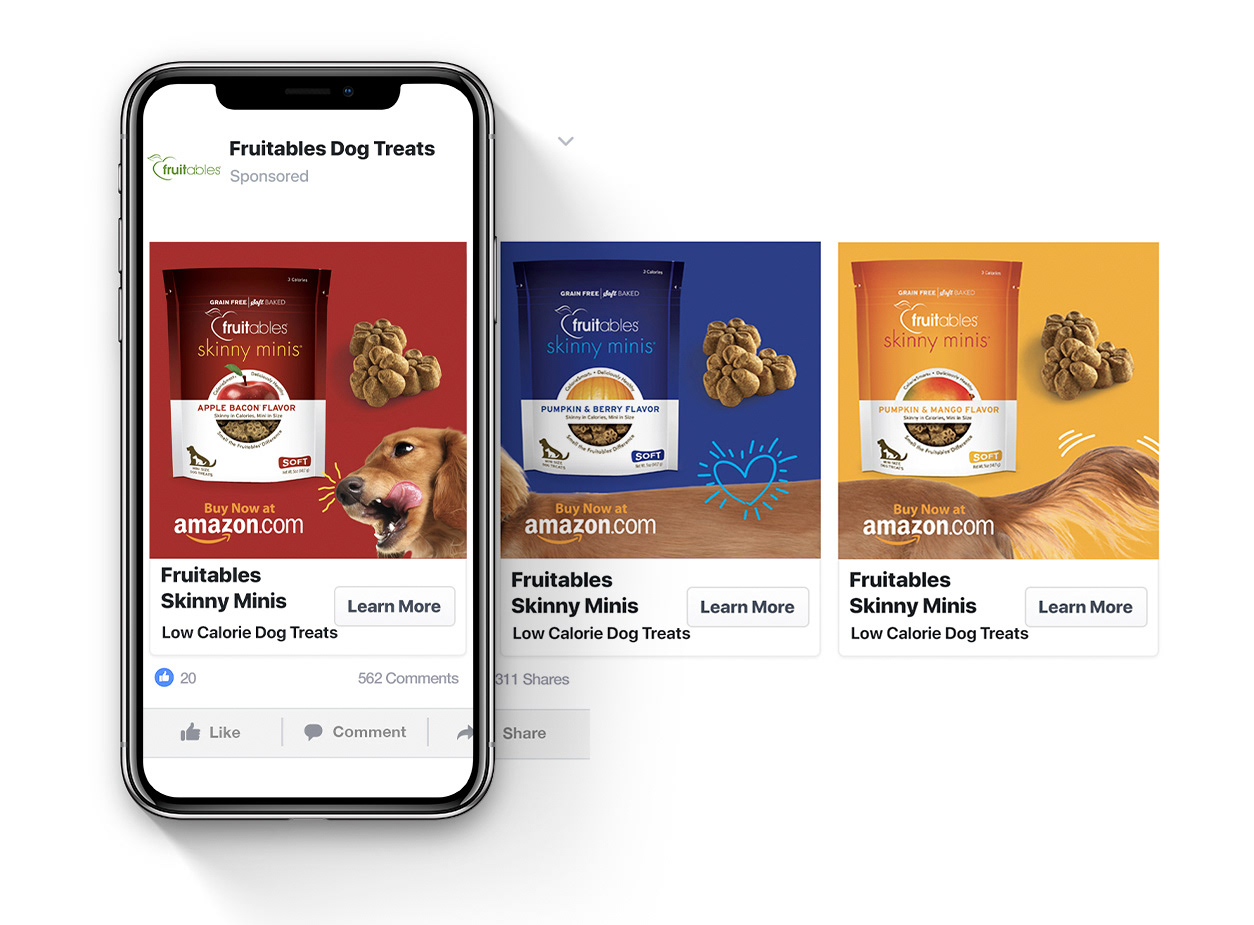
Carousel Ads allow you to showcase multiple products within a single ad. This is a great format to use for related products. By grouping similar products together in a carousel, you can re-target people who viewed that category of products on your website, and they will be more likely to engage with the ad as they have previously had exposure to similar/ related products.
How to Implement:
1. Create Carousel Ads:
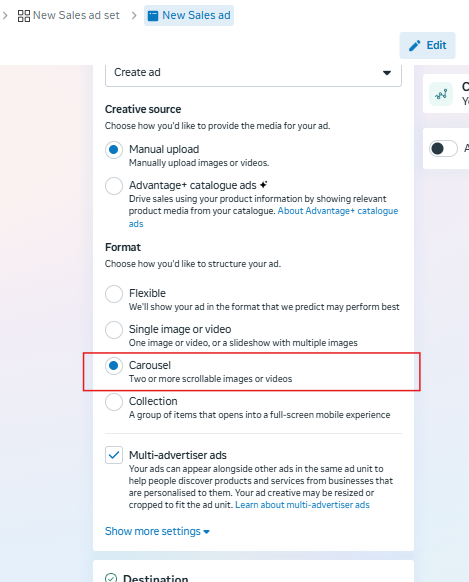
Step 1: In Meta Ads Manager, under Ads, create a new ad and select Carousel as your ad format.
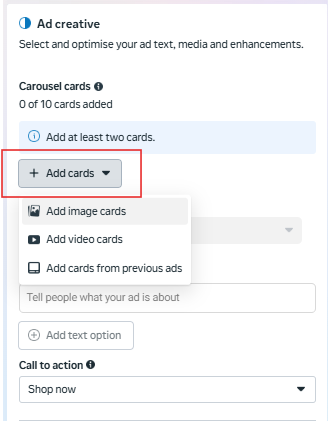
Step 2: Choose 5-7 products you want to feature in the carousel, and use high-quality images for each product.
2. Create specific retargeting audiences who have visited those 5-7 products
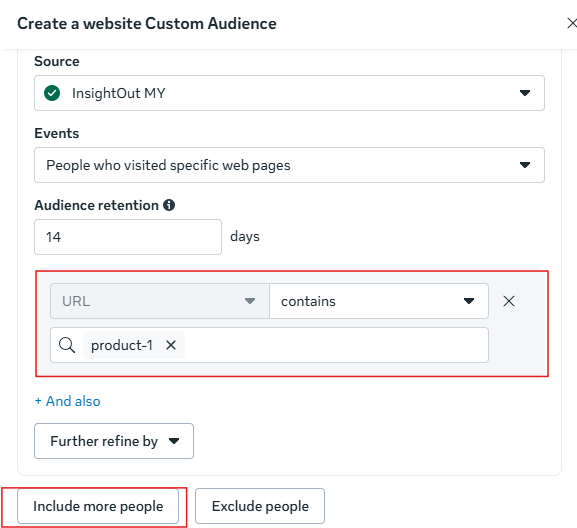
Step 1: In Meta Ads Manager, go to Audiences > Create Audience > Custom Audience
Step 2: Select website visitors as the source
Step 3: Select “People who visited specific web pages”
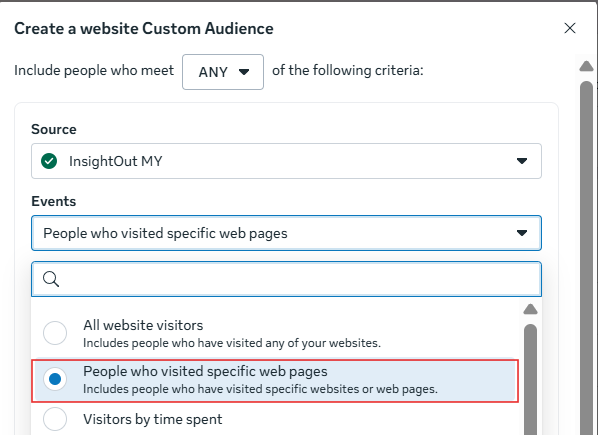
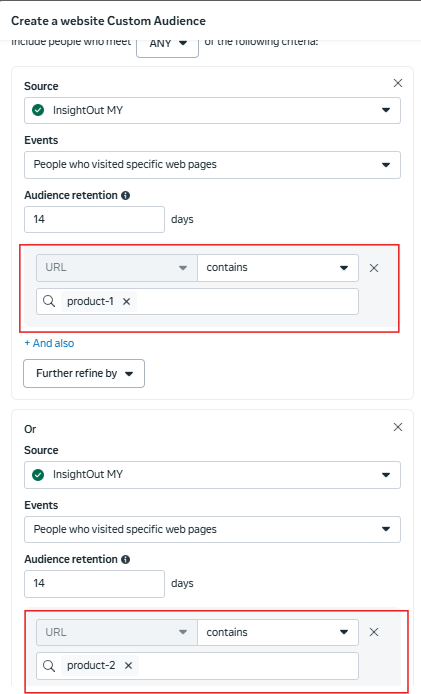
Step 4: Insert the URL slug of the 5-7 products by adding each of the URL slugs individually. Make sure to use the “OR” criteria by clicking the “Include More People” button.
Step 5: Save the audience and use the audience in your campaign set up.
Create multiple carousel “mini catalogs” and their corresponding retargeting audiences for as many categories as you’d like with this method.
5. Utilize Lookalike Audiences to Expand Your Reach
If you’ve already got a pool of previous customers, lookalike audiences will boost your ROI as they let you reach new people who share similar characteristics with your best customers. This is one of the most powerful ways to scale your Meta Ads campaigns, allowing you to attract high-quality traffic that is more likely to convert.
Take note that you need at least 100 previous customers per location to implement lookalike audiences. If you’re not there yet, try to scale your other campaigns until you get your first 100 customers.
If you’re new to lookalike audiences, it can be overwhelming as there are so many types of lookalikes. Here are 2 that we recommend.
Lookalike 1: Past customers that have been tracked by Meta Pixel
Who should use this lookalike audience?
- If you have already installed your Meta pixel onto your eCommerce store for some time and there have been more than 100 purchases tracked by Meta pixel.
- If you do not fulfil this criteria, skip ahead to the lookalike 2 alternative below, but come back here once you’ve met the criteria.
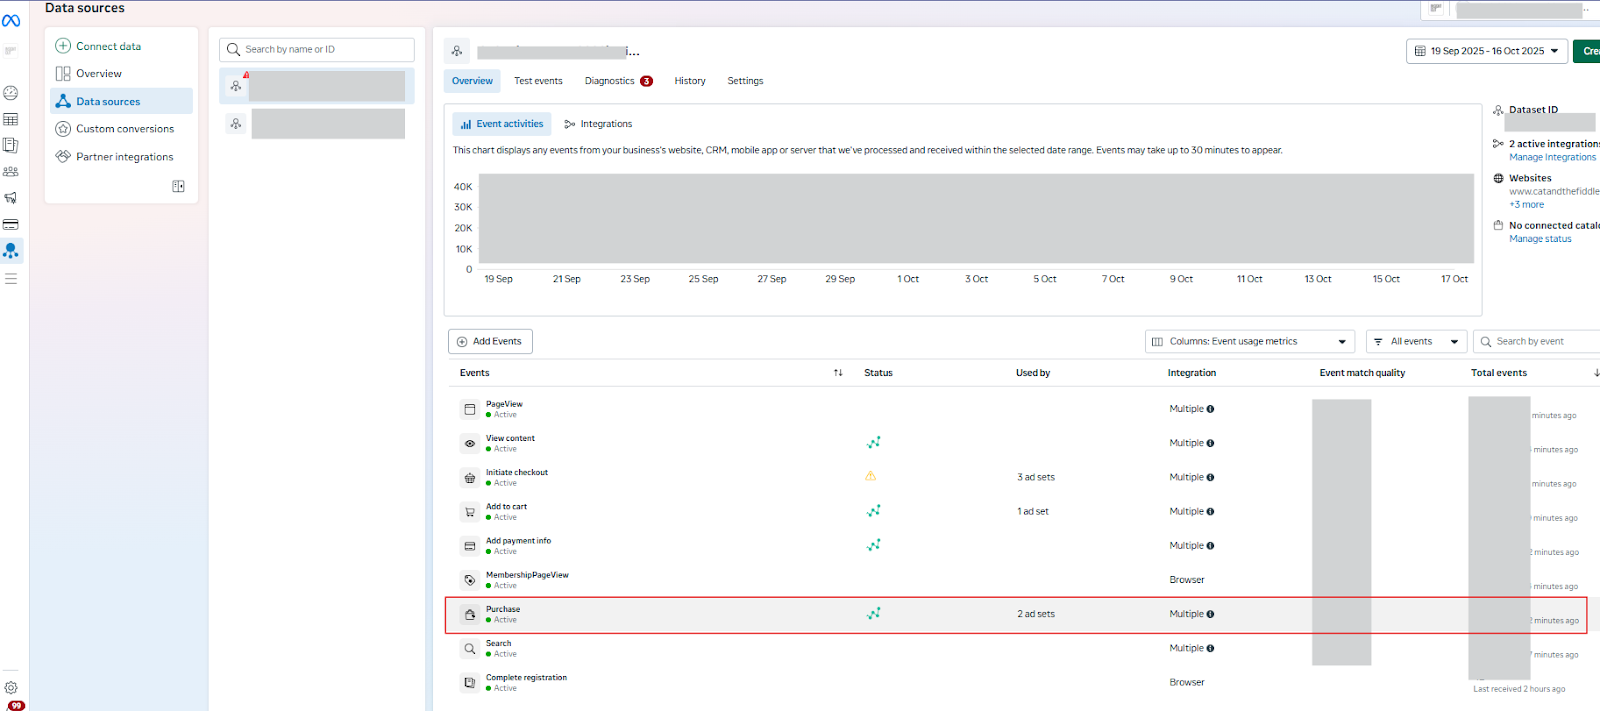
- Check how many purchases have been tracked by your Meta pixel via Events Manager > Data Sources
How to set up past customers lookalike tracked by Meta Pixel:
- Create a custom audience first of past purchasers
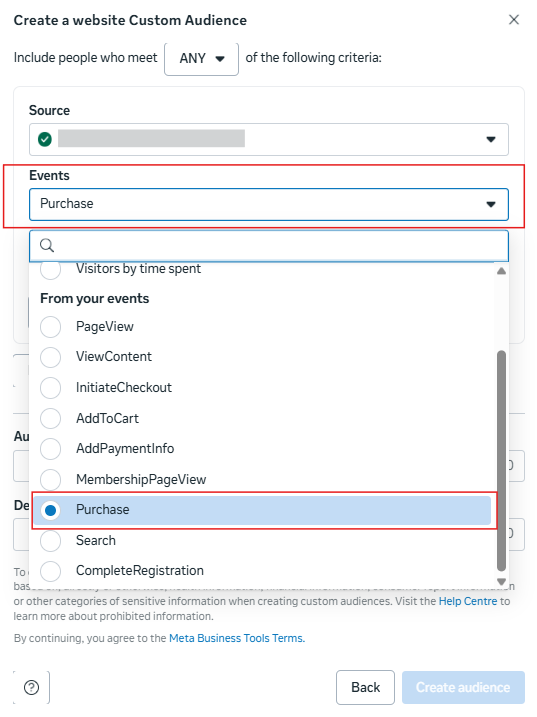
- Step 1: In Meta Ads Manager, go to Audiences > Create Audience > Custom Audience
- Step 2: Select website visitors as the source
- Step 3: Select visitors who have purchased a product
- Create a lookalike audience from the past purchasers custom audience you’ve just created.
- Step 1: Select the custom audience as your source under “other sources”
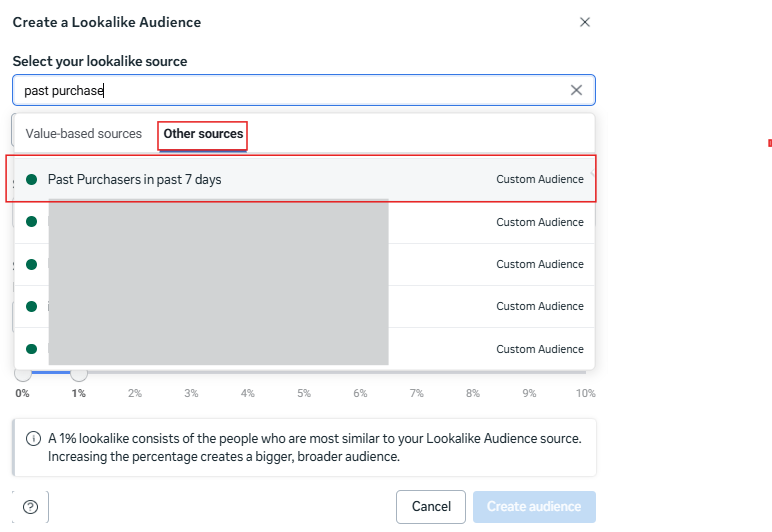
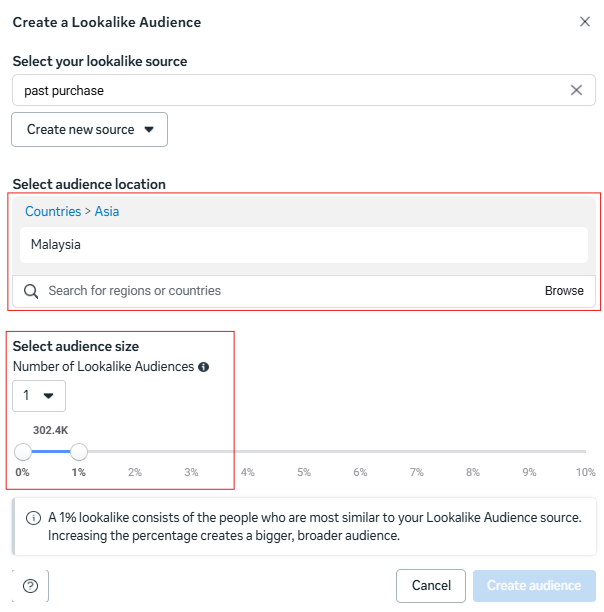
- Step 2: Select your location and percentage lookalike. We recommend to start with a 1% Lookalike Audience for the best results, and experiment with broader percentages later.
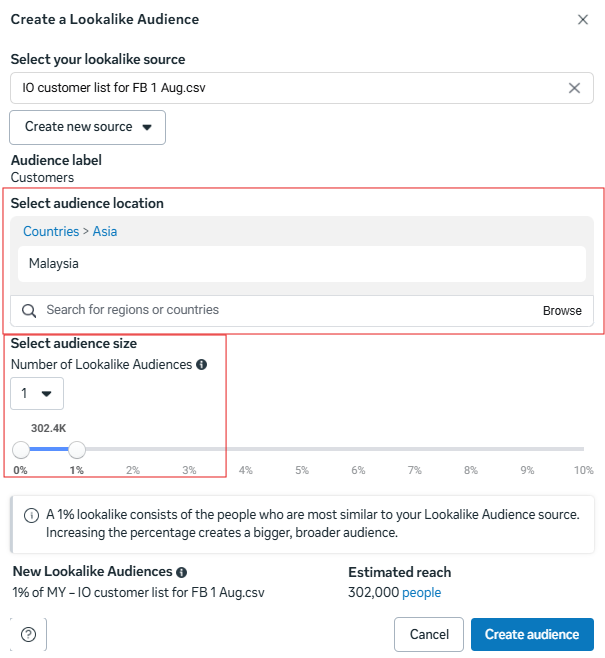
Lookalike 2: Customer list imported into Meta
Who should use this lookalike audience?
- If you have newly installed your Meta pixel onto your eCommerce store and have less than 100 purchases tracked.
- But you have an existing customer database of more than 100 customers from your previous customers (before you installed the Meta pixel)
How to set up past customers lookalike via customer list:
- Create a custom audience first of past purchasers
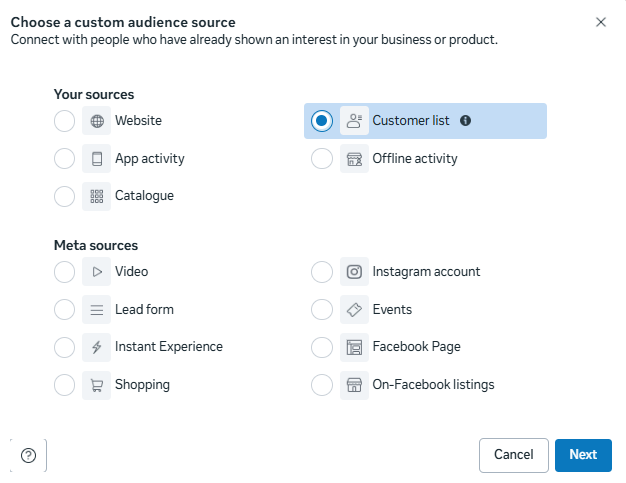
- Step 1: In Meta Ads Manager, go to Audiences > Create Audience > Custom Audience
- Step 2: Select customer list as the audience source
- Step 3: Import your customer list (emails or phone numbers along with names)

- Create a lookalike audience from that customer list custom audience you’ve just created
- Step 1: Select the customer list custom audience as your source under “other sources”
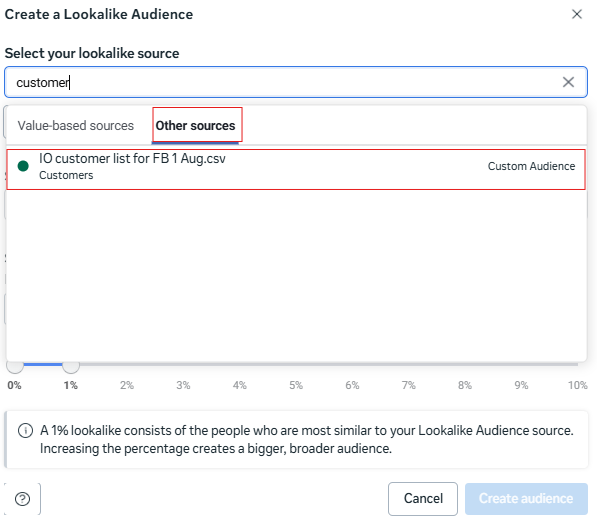
- Step 2: Select your location and percentage lookalike. We recommend to start with a 1% Lookalike Audience for the best results, and experiment with broader percentages later.
Once you’ve created your audiences, give them some time (~a day) to populate before using them in your campaigns.
Want to know even more strategies to help improve your Meta ads performance or grow your advertising on other channels such as Google Ads? Join us at our upcoming Performance Marketing seminar where we share actionable strategies to drive more conversions and help you scale your business faster and smarter.