-01.png)

1. Understanding the Basics of Meta Ads Tracking
Before diving into the technical stuff, let's first talk about why tracking matters. When you run ads on Meta platforms, you need to know what's happening after someone interacts with your ad. Are they clicking, converting, or just scrolling past? Tracking helps you understand exactly what’s going on so you can make smarter decisions.
Tracking Meta Ads means using tools to measure things like clicks, purchases, sign-ups, and engagement. It’s how you’ll know if your money is being well spent or if your campaigns need some tweaks.
2. Setting Up Facebook Pixel for Accurate Tracking
One of the first things you need to do is install the Facebook Pixel. This little tool is key to tracking user activity on your website after they click on your ads. It’s how you know if your ads are driving the right actions, like purchases or sign-ups.
Here’s how to get it up and running:
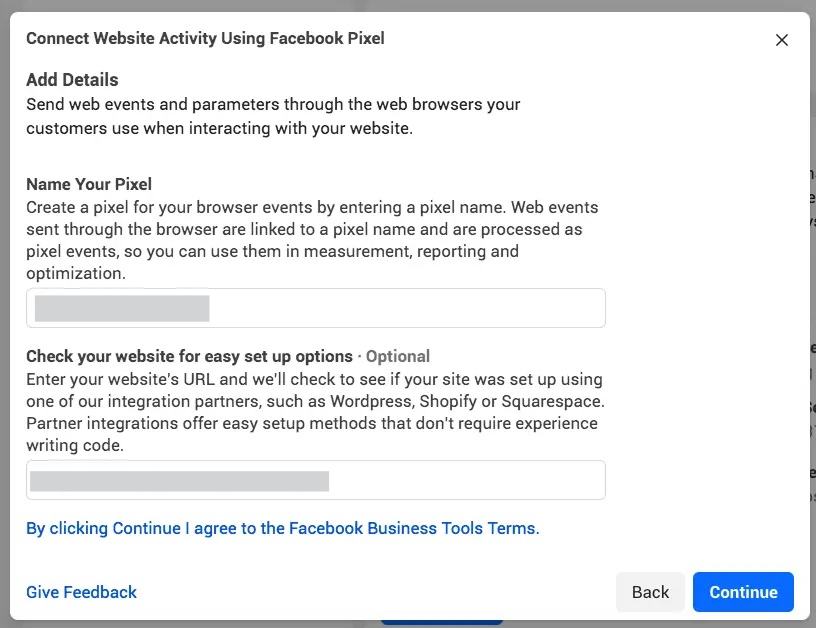
1. Create Your Pixel: Go to Facebook Ads Manager, find Events Manager, and select Pixels. Then, follow the simple prompts to create your Pixel.
a. Go to Meta Events Manager.
b. Click Connect data and select Web and select Facebook Pixel.

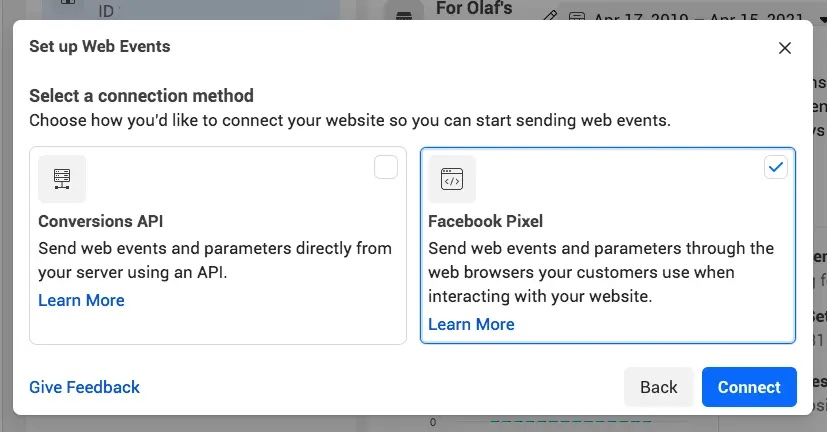
c. Click Connect.
d. Enter a name for your pixel, then click continue. This creates a new ID, viewable in Events Manager.
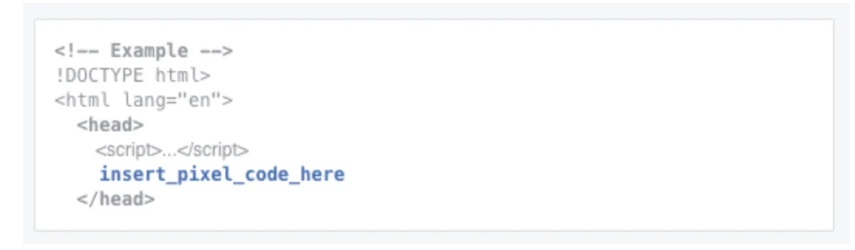
2. Install the Pixel Code: After you create your Pixel, you’ll get a code snippet that needs to be added to your website’s header. If you're using a CMS like WordPress, there are plugins to make this easier.
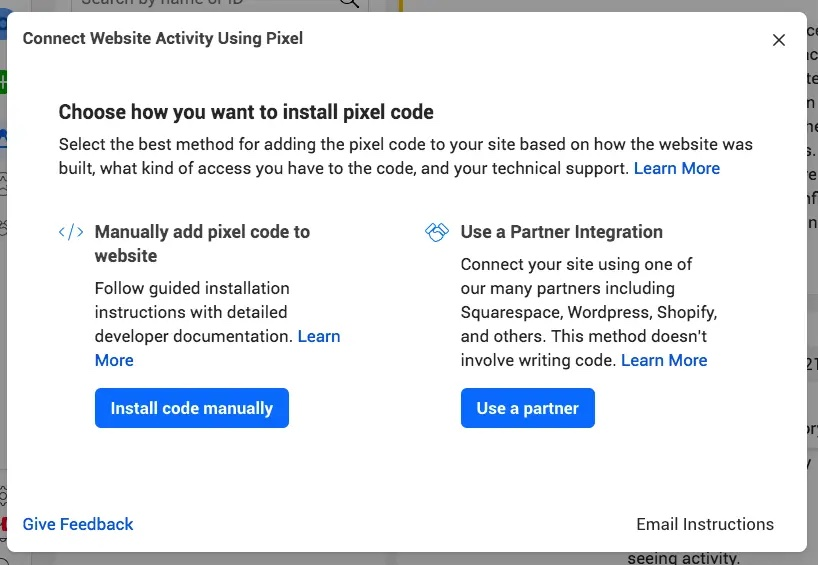
a. Click on install code manually
b. Copy the base code
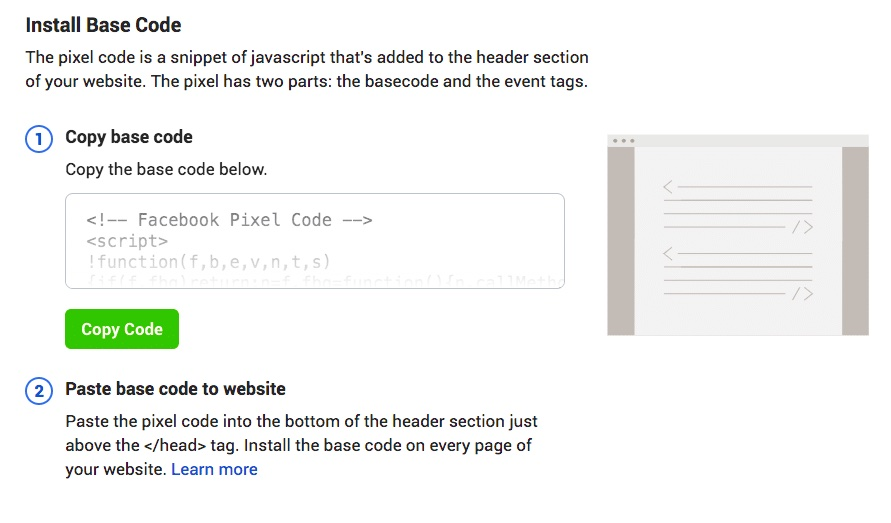
c. Find the header of your website or locate the header template in your CMS or web platform and paste the base code at the bottom of the header section, just above the closing head tag.
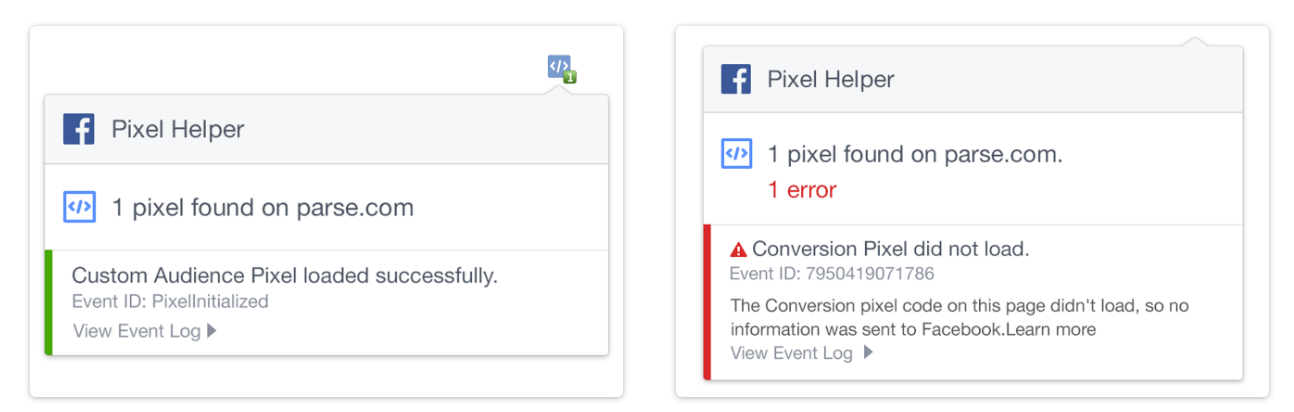
3. Test It Out: Once it’s installed, test whether the pixel is firing. I usually use the Meta Pixel Helper Extension. Install the Meta Pixel Helper extension on Google Chrome and launch the website. The extension will show if the Pixel is firing correctly.
4. Track Conversions: With the Pixel, you can track specific actions, such as purchases or form submissions, to understand how well your ads are driving results.
3. Conversion Tracking and Custom Conversions
Conversion tracking is the key to knowing if your ads are generating specific actions—like purchases, sign-ups, or lead form submissions. Tracking these conversions is crucial because it tells you how effective your ads are at driving the actual results you care about.
Here’s how to track conversions and create custom ones:
1. Set Up Standard Conversions: In Facebook Ads Manager, head to Events Manager and then Custom Conversions. You can start by tracking basic actions like purchases, page views, or add-to-cart events.
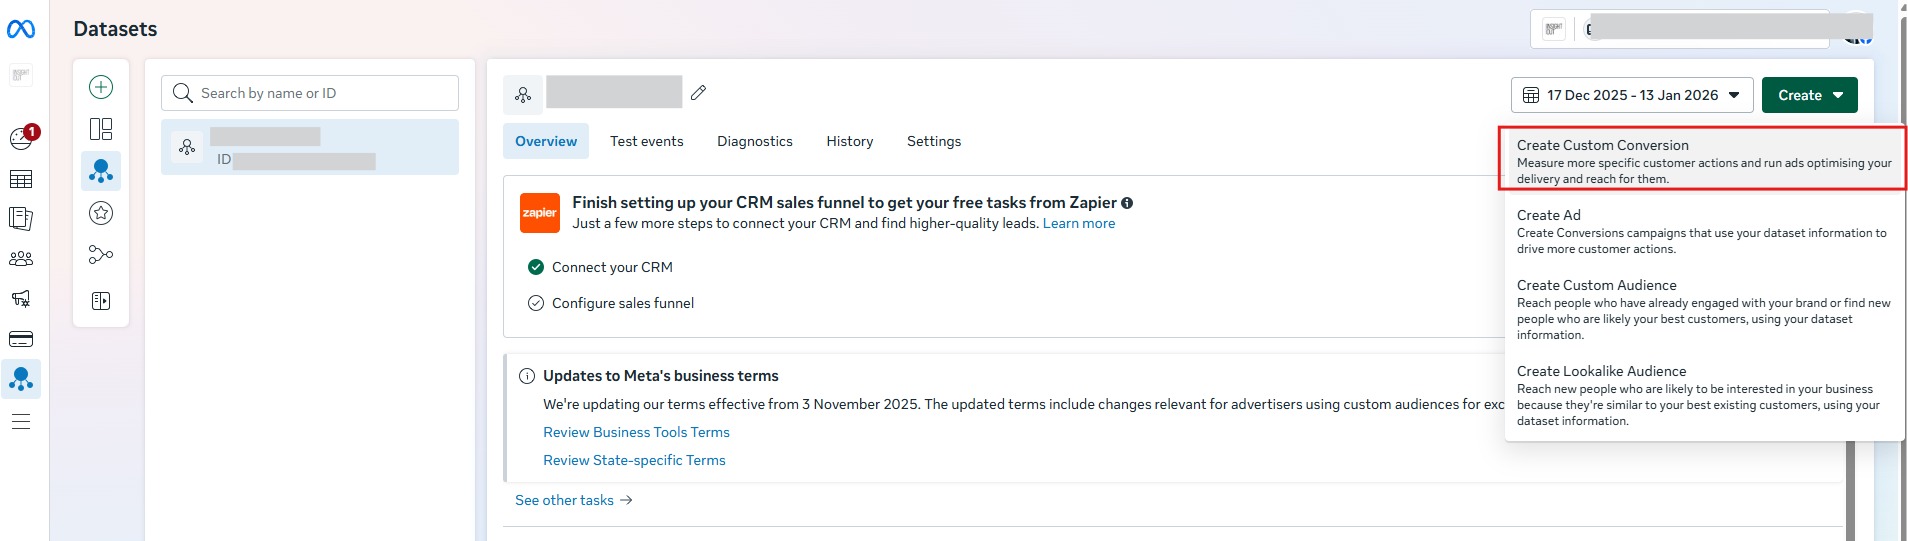
2. Create Custom Conversions: Want to track something specific, like when someone adds a product to their wishlist or clicks a particular button? You can create custom conversions for those actions.
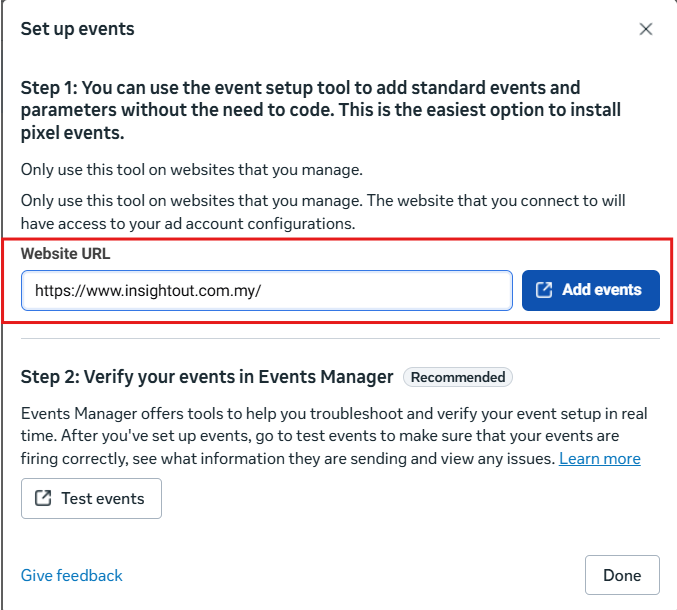
a. On your dataset, click add events

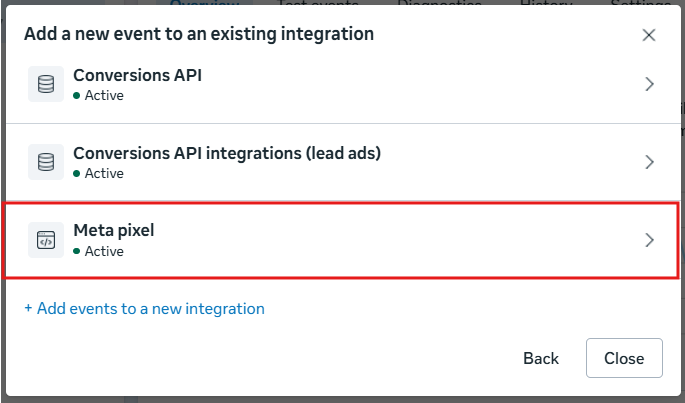
b. Click use existing integrations

c. Choose a relevant integration, for this example, I’m using the Meta Pixel.
d. Insert the landing page URL and click “Add events”
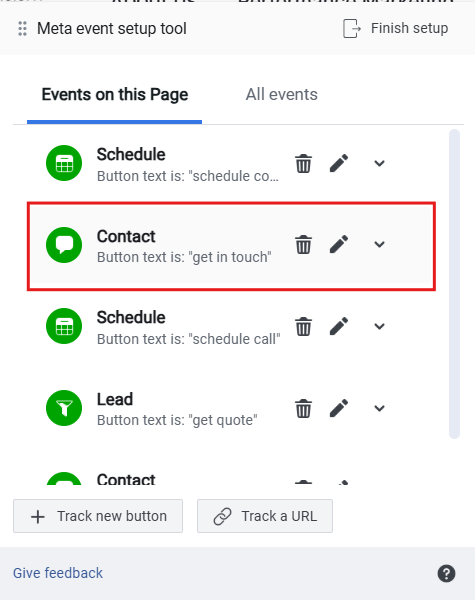
e. On your landing page, you will see the Meta event tool set up. Click either Track new button or track a URL.

f. For this example, I’m going to track a new button. You can select any of the highlighted buttons

g. And then tag that selected button to a specific event in the dropdown list on the top left corner. In my example, I've selected contact as the new event for my “Get in touch” button.

h. Now you should be able to see your new event under the Meta event set up tool.
3. Test your new conversions: Be sure to test that the events are firing by doing a test.
a. You can go to Events manager and click on the test events tab. Select the relevant channel. In my case, it will be the website.
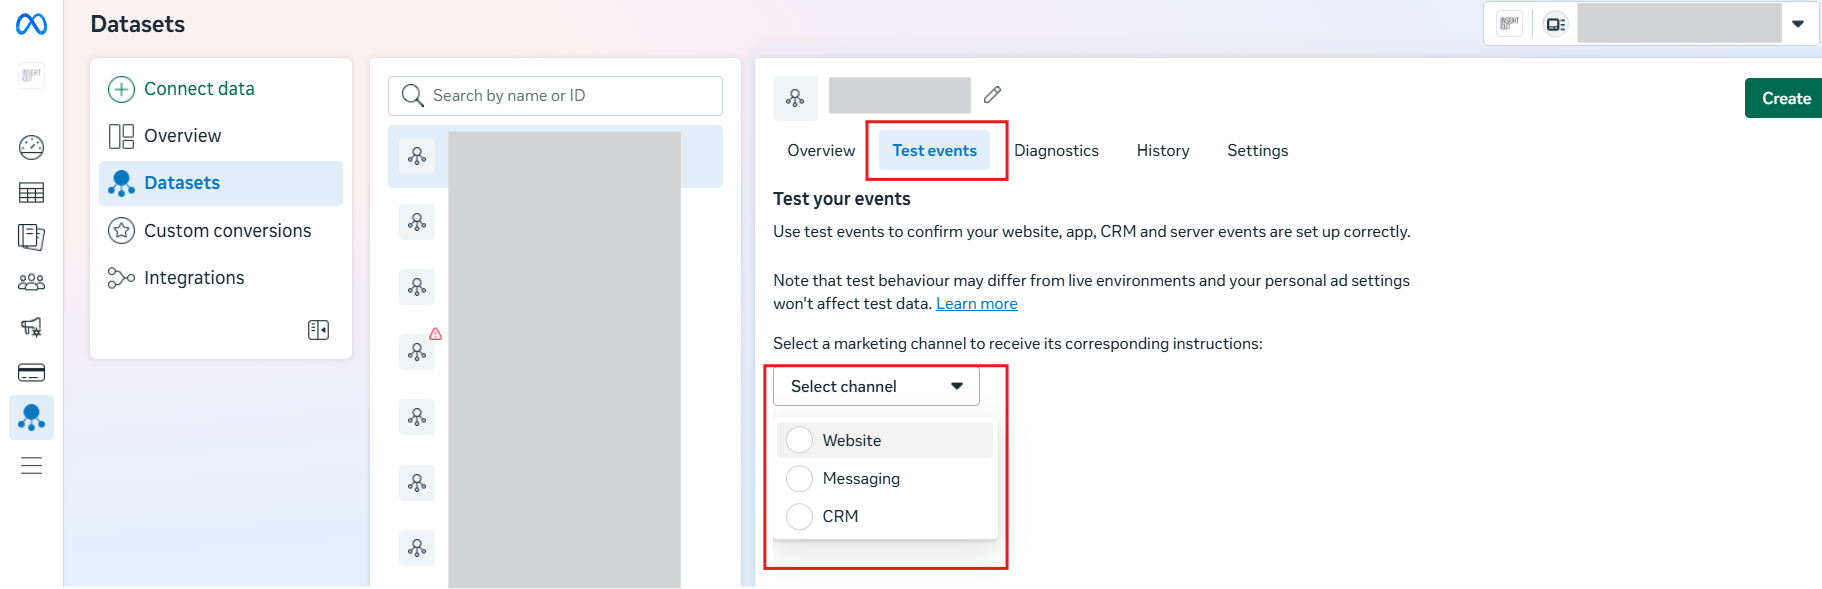
b. Under “Confirm the website’s events are set up correctly”, input the website and click test events to open up the landing page

c. Once the landing page has opened, click on the new button you’ve added as a conversion and check back on the Meta Events Manager tab. You should see your new event logged as an event received.
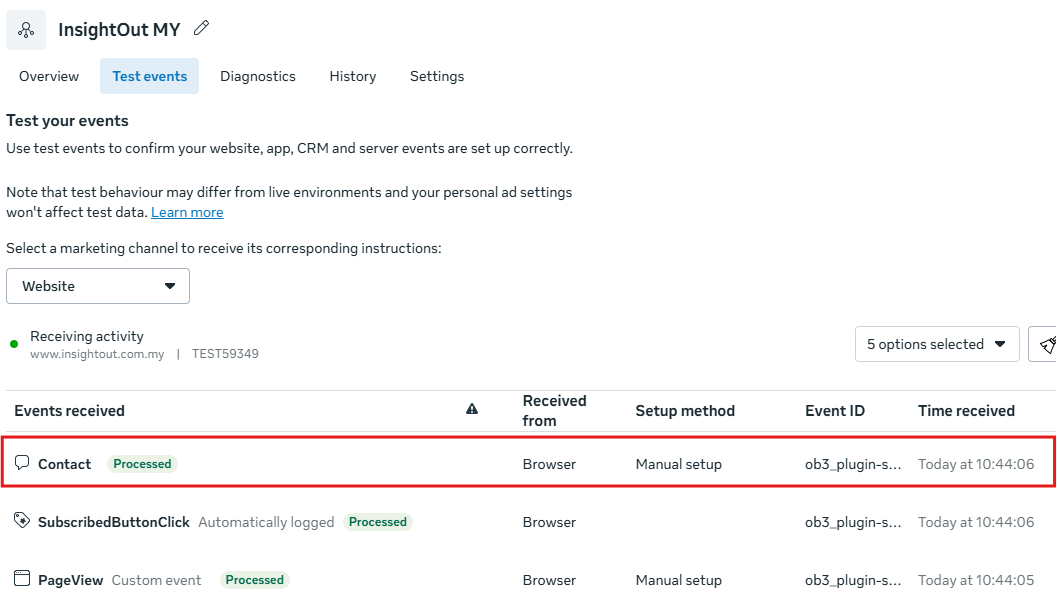
d. Do note that sometimes there is a lag of about 1 day between when the event is set up and when the testing is successful. Hence custom conversions and events should always be set up a few days prior to running campaigns.
Once conversions are set up, Facebook’s system will deliver your ads to people most likely to take those actions. You can use this data to adjust your targeting and optimize your budget for maximum impact.
4. Implementing UTM Parameters for Data Segmentation
Next up: UTM parameters. These are simple tags you add to your URLs to help track the performance of your Meta Ads in more detail. With UTMs, you can see exactly where your traffic is coming from and how it’s performing in your analytics tools like GA4 or even your eCommerce platforms like Shopify. It’s like being able to see exactly how different ad variations are performing, so you can double down on what’s working.

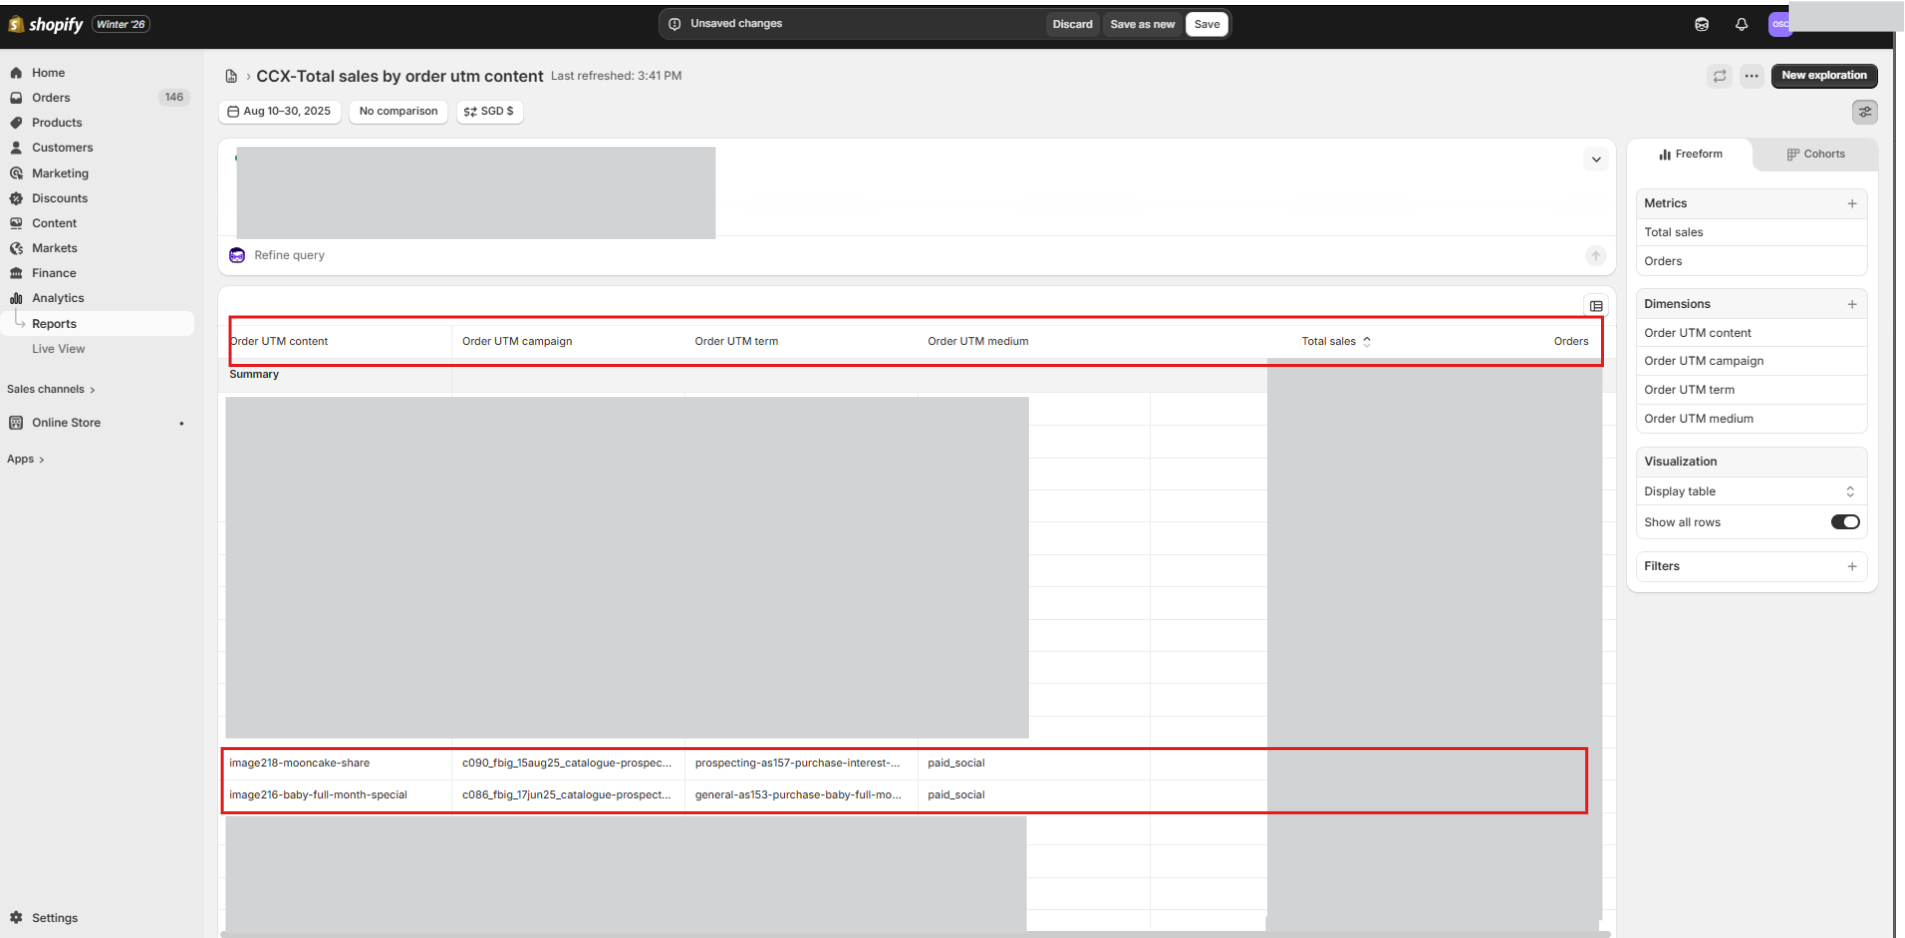
The parameters I recommend using:
utm_source=facebookutm_medium=paid_socialutm_campaign=your-campaign-nameutm_content=your-ad-nameutm_term=your-adset-name-or-audience-name
Here are a couple ways of how I set up UTMs for my ads:
Method 1: Use a UTM builder
- Type your parameter fields into Google’s UTM Builder to create URLs with these tags.
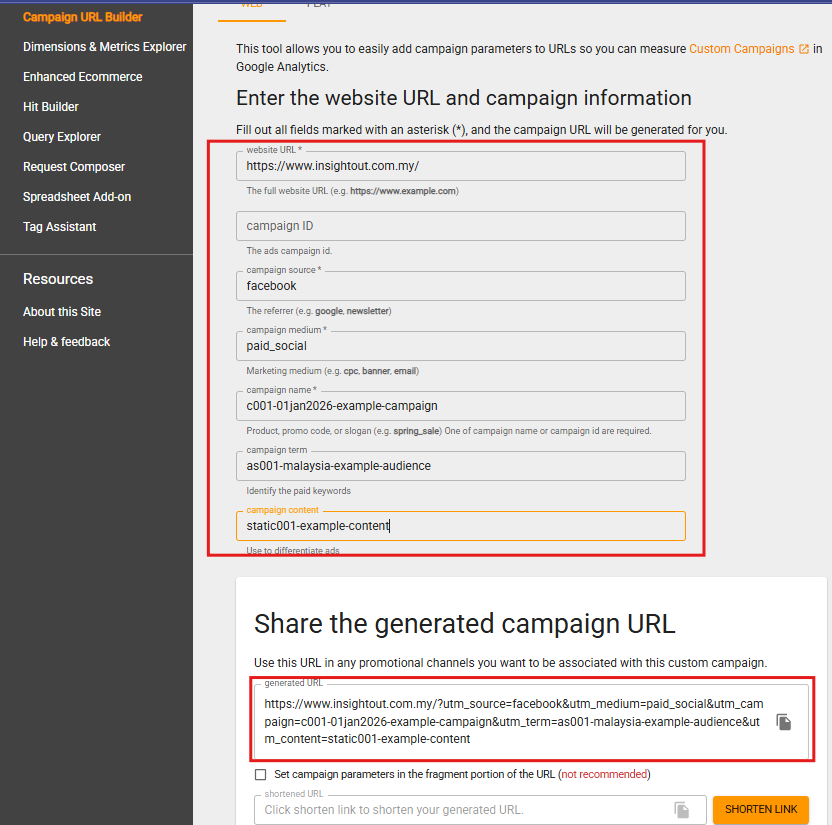
- Copy the URL generated
- In your campaign, under the ad level, add the URL generated (base link +UTMs parameters) into the final link of your ad in your ad manager.
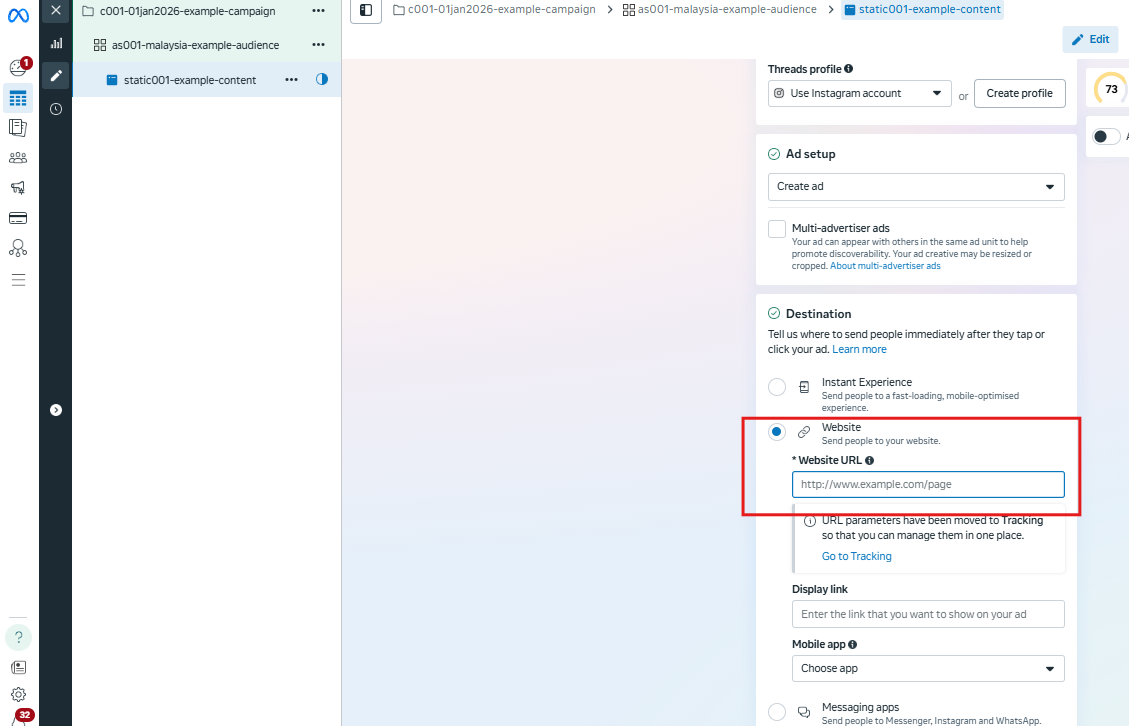
Method 2: Use the in-built Meta Ads UTM parameter to build your own UTM link.
The mechanism is very similar to Google’s UTM builder. This method will help you save the extra hassle of navigating to another website to generate a link.
1. In your campaign from your ad manager, under the ad level, add the landing page (without UTM) “Website URL” .

2. Scroll to the bottom, under “Tracking” and click on “Build a URL parameter”

3. Fill in the parameters and click apply

Method 3: (Advanced) Use the dynamic parameters under Meta’s UTM parameter tool.
Manually creating UTM parameters for every ad can get messy fast, especially once you’re running multiple campaigns, ad sets, and creatives. This is where dynamic UTM parameters in Meta Ads come in.
Meta allows you to use dynamic parameters like campaign name, ad set name, and ad name directly in your UTM structure. Dynamic UTMs automatically pull in ad level data, so your links update themselves without you having to rewrite UTM parameters every time. This keeps your tracking consistent and makes reporting far easier.
Instead of hardcoding values, you can use placeholders that Meta will fill in automatically when the ad runs with the names you’ve keyed in the ads manager.

The main caveat is that you must have a proper naming convention and each campaign or ad name is unique and do not have duplicates so that the data is clean. I usually like to use numbers (e.g. c001 for campaign1/ static001) or IDs to make sure they are unique.
A simple dynamic UTM setup might look like this:
Hardcoded fields:
utm_source=facebookutm_medium=paid_social
Dynamic fields:
utm_campaign={{campaign.name}}utm_content={{ad.name}}utm_term={{adset.name}}
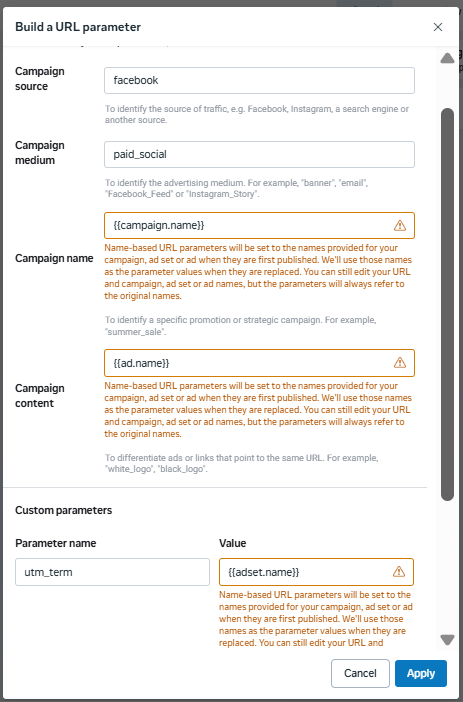
As per the warnings in orange, be sure that your names inserted into the ads manager are correct before you hit publish for the first time, as they will use the names set when you first published it, regardless of if you update the name later on after the very first publish.
With this in place, every click is tagged with the exact campaign and ad that drove it. When you open Google Analytics, you can clearly see which campaigns, ad sets, or creatives are actually performing.
Dynamic UTMs are especially useful for running more than a handful of ads as dynamic UTM parameters will save time and reduce errors.
Conclusion
Tracking and measuring your Meta Ads is a game-changer. If you’re not measuring, you’re leaving a lot on the table. By setting up the Meta Pixel, tracking conversions and using UTM parameters, you’re setting yourself up for success.
Once everything’s in place, you’ll have the insights you need to make smarter decisions, optimize your ads, and make every dollar spent count.